How to Connect Printer With PC, Mac and iOS Devices?
July 7, 2023
Printing is the need of the digital electronic world today. And when it comes to printing, printers are inevitable. But a proper setup/connection is quintessential for printing a document, email or photograph from a PC, Mac or iOS device, a proper setup/connection is quintessential. It is a way to transfer files to the device you're using and then print.
Do you know how to connect the printer to your device? This blog post will cover easy procedures to connect printer with PC, Macs and iOS devices. Please read it and follow the steps to prepare your printer to print from several devices.
How to Connect Printer With PC via Wi-Fi?
If you have a network-capable printer failing to get detected automatically, you can use manual procedures to connect it. All you will require is to move toward the printer menu, configure a TCP/IP port and install the drivers. Below are the steps to add the printer to a Windows computer.
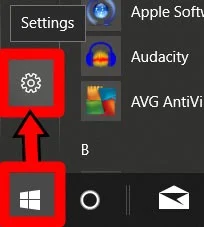
- Firstly, open the Start menu in your Windows. You can find a Windows logo button in the bottom-left corner of your Windows screen.
- Hit on Settings. It is present just above the Power button.
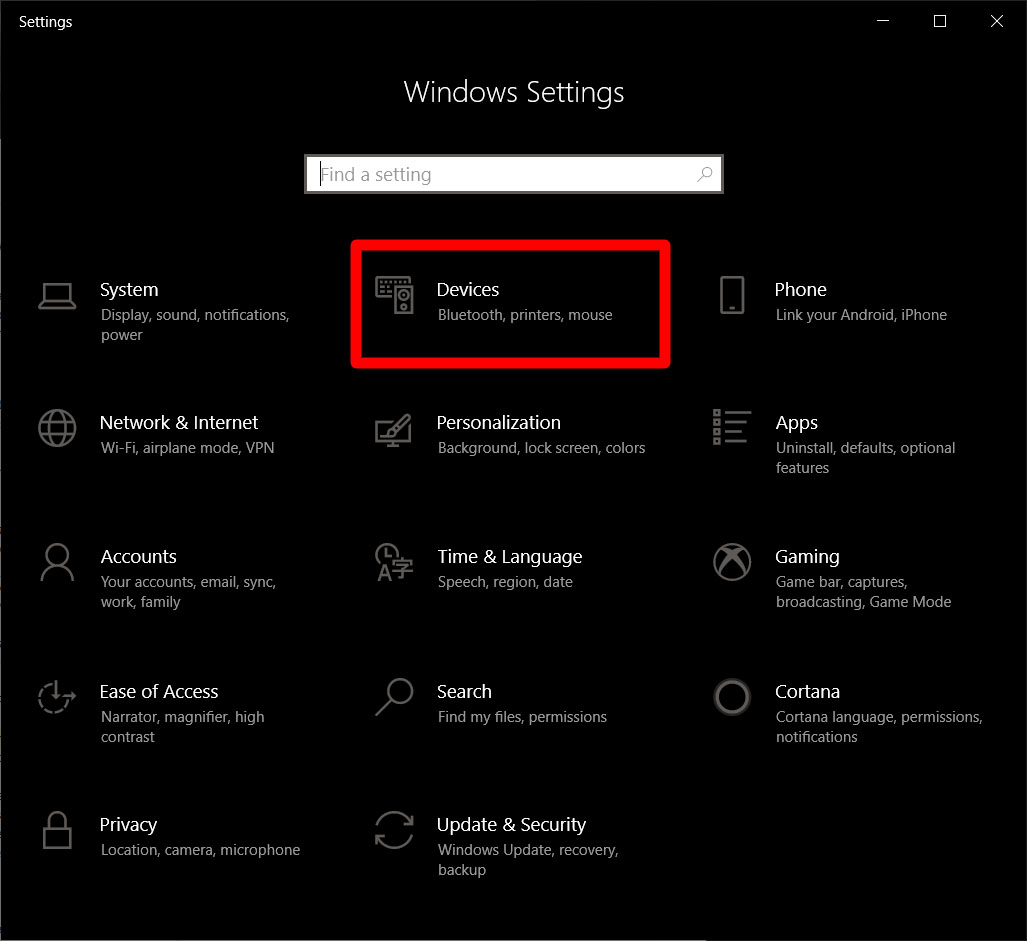
- After that, click on Devices.
- Then, choose Printers & Scanners, which is in the left sidebar.
- In the next step, click on Add a Printer.
- Your Windows will start detecting the printer. Follow the on-screen instructions for properly connecting the printer. But if your Windows can't auto-detect the printer, move to the steps below.
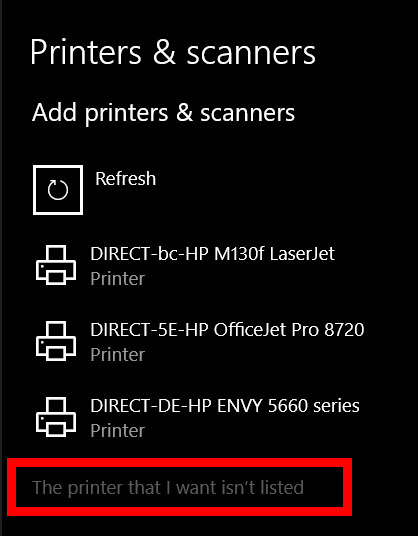
- Click on The Printer that I want isn't listed. When you select this option, the Add Printer screen will appear.
- Choose Add a local printer/network printer using manual settings. Click Next, then.
- Click Create a New Port and choose Standard TCP/IP from the drop-down box.
- Type in your printer's IP address and hit on Next. The process will take some time as the computer tries to detect the TCP/IP port at this moment,
- Then, choose the appropriate device type. Windows then detects the driver; you will receive a notice once it successfully detects the driver.
- The printer will be added to the devices list under the Printer & Scanner menu.
- Now, initiate installing the print driver. Choose the manufacturer of your printer and then the driver based on your printer's model.
- Later, click on Use the currently installed driver (recommended). Tap on Next.
- Next, set up optional preferences. Enter the printer's name. Or you can click Next otherwise. When the next window appears, you can set up the printer sharing and click Next when you're done.
- Finally, try to print a test page. Either Print or click on Finish.
Try these steps to connect the printer to a PC and begin printing your important documents.
How to Connect a Wireless Printer to Your Mac?
Know the two easy procedures to connect a wireless printer to a Mac device. Below we will describe the process to connect the printer via WPS and IP address.
Method 1: Using a WPS Mode
You can connect the printer via WPS by pressing the wireless or Wi-Fi button on your printer. And then, hit the WPS button on your router. Steps can vary based on the printer and router. Thus, you can check user guides for specific instructions for the printer and router. Proceed with the steps provided below.
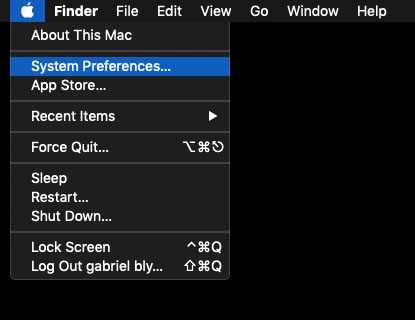
- Move to the top-left corner of your screen and click on the Apple icon.
- Next, Move to System Preferences.
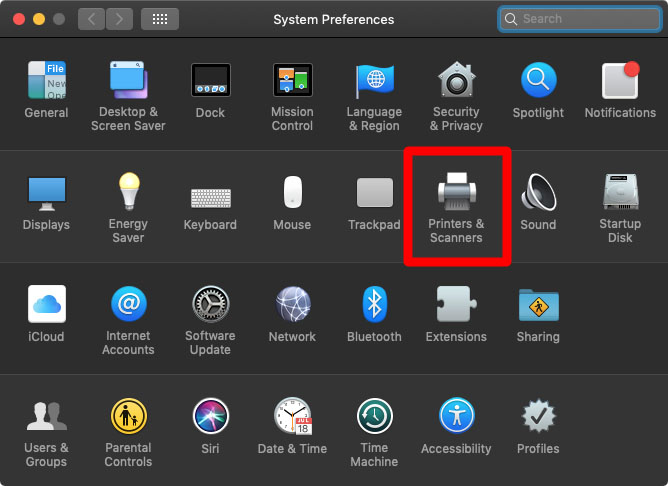
- And then click on the Printers and Scanners section. If you have older Mac models, this option appears under Print & Scan under the Hardware section.
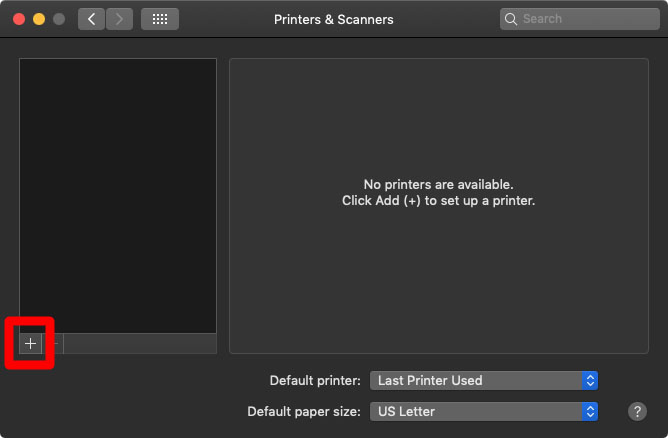
- Now, click on the + sign below the printers' list. For older Mac models, click Add Printer or Scanner after clicking the + sign. You can see your printers detected by Mac devices under Nearby Printers in the Add Printer or Scanner submenu.
- Next, choose the printer you want to add. Get to see the list of discoverable printers in the Default tab.
- Select the software or driver for your printer in the Use field. Choose options from below:
- AirPrint is a native printing technology by Apple. It helps print from AirPrint-compatible drivers using Wi-Fi on Airprint-compatible printers.
- On the other hand, if your printer is not compatible with AirPrint, try to install the driver from Apple's servers or the manufacturer's official website.
- If you have installed the printer driver, your printer will own it.
- If you don't have the print driver but want your system to download the one when it updates, choose the Auto Select option.
- Finally, click on Add. See your printer model on the left side of the Print & Scan windows.
Method 2: Via IP Address
To proceed with this method, you need to know the IP address of your printer first. Once you get this information move to System Preferences and try to add your printer via the Printers & Scanners menu. Here is a step-by-step procedure on how you can do it.
- First, click on the Apple icon.
- Then, open System Preferences and then click on Printers and Scanners.
- When the list of printers appears, click on the + sign below it.
- Next, hit on the IP icon. It looks like a blue globe icon.
- Go to the Address field and enter the IP address of your printer. The Mac will then start to gather your printer's information.
- After that, you can rename the printer if you want.
- Now, select the print driver in the Use field.
- In the last step, click on Add.
How to Connect a Printer to an iPhone/iPad?
Are you looking for a way to print from your iPhone or iPad? Connect your printer to the device and then print to get your document into your hands. Here are the steps you can take.
-
Connecting AirPrint-Enabled Printer to iPhone or iPad
If your printer is AirPrint-Enabled, you can execute the below-mentioned steps to add your printer to your iPhone/iPad device. First, check that your printer is AirPrint-enabled. And then go through the next steps to begin printing.
- Firstly, open the picture or document you want to print.
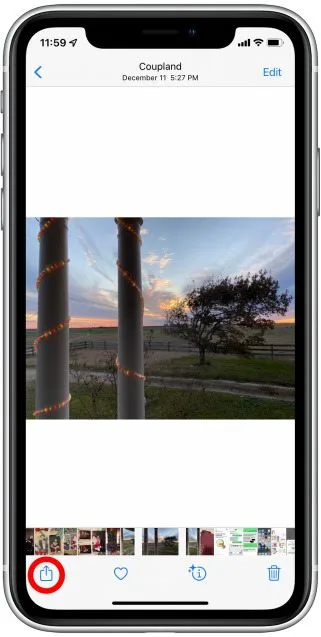
- Next, click on the Share icon at the bottom-left of your screen.
- After that, scroll down in the iOS Share Sheet until you find Print.
- Now, tap on the printer to view the list of all AirPrint-enabled printers.
- Lastly, select a printer, and you can begin to print.
Note: Your printer and iPhone/iPad devices must be connected to the same Wi-Fi network.
-
Connecting AirPrint-Unsupported Printer to iPhone or iPad
Is your printer not supporting AirPrint? You can add an AirPrint-Unsupported printer directly to iPhone or iPad devices. However, there are several options that you can employ.
- First, download any third-party apps for your specific printer.
- Send documents to print from your iPhone or iPad using that app.
- Contact qualified experts via Call or Live Chat to print without hassles.
Conclusion
Printing from several devices is convenient with easy and effective procedures. For a wireless printer, there is a need to connect the device over a Wi-Fi network first and then to your Windows computer. You can connect printer with PC through Wi-Fi and add it to the Mac through WPS or IP address. AirPrint is a perfect way to print from iPhone and iPad devices.
Frequently Asked Questions
Question
Why is my Mac not Detecting my Printer?
There can be lots of reasons for Mac not recognizing the printer. A few of them include the following:
- The printer was not plugged into a power point and turned on.
- The printer and the Mac device are not on the same network.
- In the case of a shared printer, macOS or later is not installed, the printer is in sleep mode, or sharing is not turned on.
Question
How do I Connect my Printer to my Mac Computer Wirelessly?
Get ready to print wirelessly from your Mac computer using the AirPrint app. Below are the procedures for it.
- Ensure your printer and Mac are on the same Wi-Fi network.
- Open a document on your Mac and choose File>Print.
- Hit on the Printer menu and select your printer.
- Choose the other print options and click on Print.
Question
How do I Connect my HP Printer to my Mac?
Connecting the printer using basic steps to print from a Mac computer is essential. Here are they:
- First, connect your printer to the same network your Mac device is connected to.
- Click on the Spotlight icon and then open Printers and Scanners.
- If the printer isn't listed, click Add printer, scanner, fax, or the + icon.
- Follow the instructions provided for a complete setup.



Enter your Comments Here: